
Boost your online presence and scale your business through our expert Custom WordPress Website Development services. Our seasoned WordPress Website Experts specialize in creating scalable, secure, and feature-rich solutions tailored to diverse client needs across various industries.
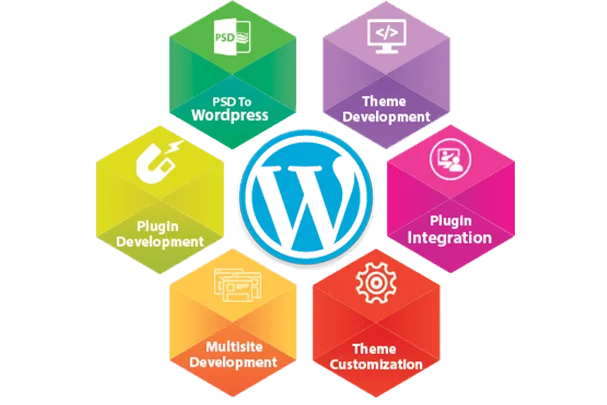
Our WordPress Custom Theme Development focuses on mobile-first strategies, transforming your precise designs into responsive, W3C compliant WordPress CMS themes. With the expertise of our seasoned professionals, we craft visually appealing and swift-loading custom themes that set your website apart.
We are proficient in crafting user-friendly WordPress CMS solutions with scalable capabilities, extensive functionalities, and seamless integrations. Our WordPress Services empower you to take full control of your website, simplifying content management. We prioritize ensuring our clients harness the maximum potential of the WordPress CMS platform.
Enhance your WordPress website's capabilities with custom extensions, plugins, and modules through our WordPress Plugin Development services. Leverage our extensive collection of bespoke plugins crafted to meet a variety of business requirements. We enable businesses to fully utilize their WordPress site's potential with tailored plugin solutions.

Advance your digital journey with a WordPress-based eCommerce site designed to maximize revenue. Our skilled developers bring extensive experience in crafting effective online stores, utilizing WordPress's robust capabilities. This open-source CMS framework serves as the foundation for building eCommerce platforms that are not only powerful but also tailored to drive sales efficiently.

Streamline your business processes with our WordPress Third-Party Integration services. We skillfully connect your WordPress site with essential services, from Payment Gateways and Social Media APIs to Logistics, Shipping Gateways, and Inventory Management systems, including integration with Online Marketplaces and more, enhancing functionality and operational efficiency.

With over 12+ years of expertise, we seamlessly convert your PSD designs into vibrant, responsive WordPress websites, all within budget. Our proficiency in PSD to WordPress conversion ensures your site aligns with the latest web trends and achieves higher organic search rankings, providing a visually appealing and functional online presence.
Transition your high-level website to WordPress, the powerful CMS behind 43% of the web, with our expert WordPress Migration and Upgradation services. Catering to small businesses, bloggers, and Fortune 500 firms, our seasoned team ensures a seamless switch to WordPress, safeguarding your data, operational performance, and search rankings throughout the process.
Say goodbye to website worries with our comprehensive WordPress Support & Maintenance services. As a trusted WordPress web Development Company, we handle all aspects, from design and development to security and updates. We prioritize ensuring our continuous maintenance and support services maintain your website's smooth operation, aiming for zero downtime and disruptions.


Our team of WordPress experts takes the time to understand your specific project goals, needs, and expectations, setting the stage for a well-planned web development journey.
We provide a selection of flexible engagement models to fit your project’s unique demands, complemented by our ready-to-hire, experienced WordPress developers.
Our development process incorporates thorough documentation, exhaustive testing, and client feedback to ensure the highest quality output.
With service models in place, our top-tier WordPress web development team moves forward with designing and developing your website, ensuring it meets our high standards and your vision.
Following launch, we continuously monitor your website's performance, offering ongoing support to maintain its efficiency. This dedication to post-development care establishes us as a leading WordPress development company.